Get started
Your first data
You build one automation: a saved instruction that says “read this page and give me these fields”. Once saved, you can run it again whenever you want, and the rows pile up in My Data. A new account has 5 free requests, so you can finish this page without paying. If you did the sign-up wizard, you already did steps 1 to 4.
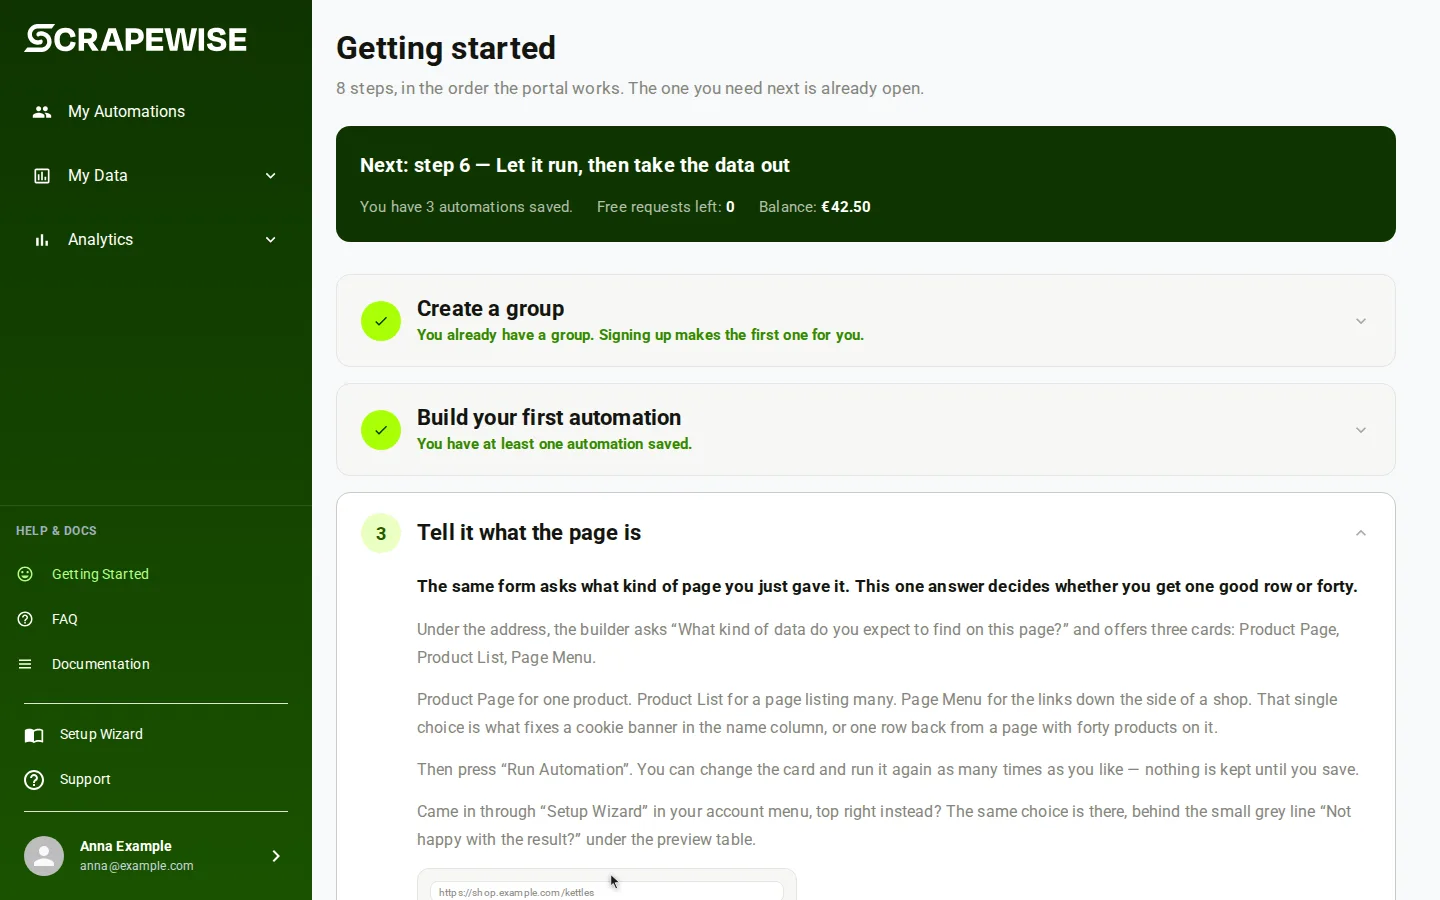
These are the eight steps of the Getting Started checklist in the portal, in the same order. Open Getting Started in the left menu to see which are done.
- Create a group. A group is a folder. Everything in it runs together and lands in My Data together. In My Automations, press the green + at the bottom right of the page. This button makes a group. The name is only for you. If you compare yourself with competitors, put every shop in the same group, because matching in step 7 only works inside one group. Signing up makes the first group for you, so this step is usually done.
- Build your first automation. There are two ways in. To Upload a file, press the … menu on the group, choose Upload and drop in a
.csv,.xlsxor.jsonl. The spreadsheet is the data, no website is read and nothing is charged. If you will compare it with a shop, pick the column with the barcode or product code when it asks. See Upload a file. To Read a website, press the + on the group box (a different button from the green one). It adds an automation to that group. The builder says “Paste the link from your browser, we recognize which API it is.” Type an Automation Name and the Website URL of one product page, not a category page and not a home page. - Tell it what the page is. Under the address the form asks “What kind of data do you expect to find on this page?”. Pick Product Page for one product, Product List for a page that lists many, or Page Menu for the navigation links of a shop. Press Run Automation. You can change the card and run again as often as you like. Nothing is kept until you save. This one choice fixes a cookie banner in the name column, or one row back from a page with forty products. If you came in through Setup Wizard, the same choice is behind the grey line “Not happy with the result?” under the preview table.
- Read the values before you save. Look down each column, one at a time. A Price column that is all zeros still looks fine from far away. Open the real page in another tab and compare two rows by hand. Wrong on every row means the page was read as the wrong kind, so go back to step 3 and pick another card. Wrong on some rows only means those pages do not show that field. An empty cell is the honest answer.
- Add the rest of your pages. One automation can read thousands of pages. Press the … button on the automation and choose Manage Links. You land on “Select or Add pages to Scrape” with three ways to fill the list. Sitemaps: most shops publish a list of every page, and you tick the branches you want, see Sitemaps. Add links: upload an Excel file, paste a column from a spreadsheet or type rows by hand. This is not the same as Upload in step 2, because here the column holds web addresses to read. Scraper-based links: use another automation’s output as the list and keep it in sync. One automation reads one site, so a link from another shop is refused. A second shop needs a second automation in the same group.
- Let it run, then take the data out. Nothing repeats until you ask. Press the … button on the automation and choose Schedule. Daily is the shortest interval. You can also pick every few days, certain weekdays or monthly. A schedule on the group governs every automation in it. Every run adds rows to My Data, where you can filter them and export to Excel. Rows are kept for 90 days. Each run costs money, so schedule only what you will look at. You can run an automation by hand any time from My Automations. See Groups and Exports and delivery.
- Match the same product across two sources. Matching joins two automations on the same product. Open My Data, pick your group and press the Matching tab next to Table Data. Before your first match there is one screen, Match the data. The tabs Results, History and Match quality appear once the first match has finished. You need two automations in the same group that have both finished a run, and one must be your own list. The screen marks it Your list and everything you match against it Compared. Draw a line from a column on your list to the column with the same thing on the other source, press Save config, then Run match. The best line is a barcode or product code, which is proof and gives an exact match. With no shared code, names and pictures are compared. That is a judgement, so pairs we are not sure about go to Review for you to confirm. Expect fewer matches than products. See Set up a match and Run a match.
- Let Claude read your data. This step is optional. An API key lets Claude, Cursor or any MCP client read your automations and run them from a chat. Press your name at the bottom of the portal menu, then API Keys. Under Generate new key name the key after the tool, pick a Scope and press Generate API Key. A Read key lets the assistant look. A Full key lets it create and change too (the MCP tab below needs a Full key). The portal shows them as the codes LLM_READ (Read) and LLM_FULL (Full). Start with the Read key if you only want to look. The window “API key generated” says “This key will not be shown again”. Copy the key and the ready-made setup text for Claude Code, Claude Desktop, Cursor or VS Code before you close it. Treat the key like a password. It never belongs in a web address. See Read or Full and Connect your assistant (MCP).
Note
The sidebar also has Documentation, FAQ and Support. Setup Wizard in your account menu runs the two-step wizard again for another address, see Sign up.
- Use a Full key. Base address
https://portal.scrapewise.ai/api/scraper-api, headerAuthorization: Bearer <key>. Send a newIdempotency-Keyheader on every PUT and POST that changes something. - Make a group with a Full key:
PUT /api/scraper/groupwith aname. Keep theidit returns. - Preview the page with a Full key:
POST /api/scraper-simple/url-basedwithname,groupIdandurl. The answer is a list of candidates. Each has ascraperDTOand a fewsampleDatarows. Read the rows before you pick one. - Save the best candidate with a Full key:
PUT /api/scraperand send itsscraperDTO. Keep the scraperid. - Run it with a Full key:
GET /api/scraper/{id}/run. - Follow the run with a Read key:
GET /api/scraper/load-history. The newest entry shows the status. - Read the rows with a Read key:
GET /api/scraper/data/group/{id}, whereidis the group id.
curl -X POST "https://portal.scrapewise.ai/api/scraper-api/api/scraper-simple/url-based" \
  -H "Authorization: Bearer $SCRAPEWISE_FULL_KEY" \
  -H "Content-Type: application/json" \
  -d '{ "name": "[AUTOMATION NAME]", "groupId": "[GROUP ID]", "url": "[ONE PRODUCT PAGE ADDRESS]" }'
The preview fetches a real page, so it takes the page price from your wallet or from your free requests. For many addresses use one automation with a list, not one per address. See Link lists.
- Connect your assistant with a Full key. See Connect your assistant (MCP).
- Ask: “Make a group called [NAME]”. It calls
scrapewise_create_scraper_group(Full). To reuse a group, it first callsscrapewise_get_scraper_group_list(Read). - Ask: “Show me what you can read from [ADDRESS]”. It calls
scrapewise_preview_scraper_from_url(Full) and shows the candidate rows. Check the values yourself. - Say which candidate is right. It saves it with
scrapewise_create_scraper(Full). - Ask it to run the automation. It calls
scrapewise_run_scraper(Full). - Ask how it went. It calls
scrapewise_get_scraper_load_history(Read). - Ask for the rows. It calls
scrapewise_get_scraper_data_group_client(Read).
For a list of addresses, ask for one automation with the whole list. The tool is scrapewise_run_scraper_url_list (Full).
From first data to a price comparison
If your goal is to compare your prices with competitors, the order of the steps matters. bebo.ee is a live Estonian grocery price comparison built on Scrapewise. It tracks 12 shops and over 130,000 products, and about 36,300 of them can be compared across chains. The rest exist in one shop only. That gap is the honest answer to “how much can be compared?”, so find your own number early.
- Decide what “the same product” means. Pick a column that identifies a product, such as a barcode (EAN) or your own article number.
- Get the addresses. One automation per shop, with that shop’s product addresses on its list. See Link lists and Sitemaps.
- Scrape the raw columns only: price, sale price, currency, stock, the identity column and the pack size as written. Calculate later with rules.
- Clean it into one shape: one currency, price per unit, one label per value. See Rules for all scrapers.
- Match. Put the shops in one group with your list as the main scraper. Read the three results: Matched, No match and Review. See Set up a match.
- Keep reading it. One scrape shows today. A year of scrapes shows who moves first. Set a schedule and export, see Exports and delivery.
If you would rather receive the comparison than build it, see Competitor price tracking.
Errors you may see
Questions
Why is nothing running on a schedule?
Nothing repeats until you ask. Set Schedule on the group or the automation. Daily is the shortest interval. Each run costs money, so schedule only what you will look at.
Where do I find my rows afterwards?
In My Data. The saved automations are under My Automations.
What counts as one product page address?
The address you would send a colleague to look at that exact product. Not a category page and not a home page.
Why do some steps never tick themselves?
The checklist ticks a step only when it can see it in your account. Steps 1, 2, 6, 7 and 8 do: a group exists, an automation is saved, one automation repeats on a schedule (its own or its group’s), a group has matching set up, and you have an API key. Steps 3, 4 and 5 have no tick on purpose, because whether you read the columns before saving cannot be observed. Only steps 1, 2 and 6 count towards the progress line.
The table came back wrong. What do I do?
Every price is 0 or blank, or the name holds a cookie banner: the page was read as the wrong kind, so pick another card in step 3. One row from a page with many products: pick Product List. Some blanks and others fine: those pages do not show that field.
Where do I find things again?
My Automations holds everything you saved, grouped by site, and is where you re-run. My Data holds the rows. Getting Started holds the checklist. Setup Wizard is in your account menu.
How long are rows kept?
90 days.
Do I pay twice if I press Run Automation again on the same address?
A page that fails to deliver is never charged, and the same address is not charged twice in one run.
Everything on this screen
The frame around every portal page:
- Open navigation menu: opens the side menu when the window is narrow.
- Support: opens the support chat. The number beside it counts answers you have not read yet.
- Describe what you need: type your question here. Say what you tried and what you expected.
- Send: sends your message to the support team.
- Close: closes the chat window. Your messages stay.
Getting started page:
- Add funds: opens the top-up dialog so your first run has money to use, see Wallet and billing.
Error screen and page-not-found screen:
- Back to home: takes you to your My Data home page.
- Try again: loads the page again. It is on the error screen only.
- Get a demo: opens the page to book a demo call with the team. It sits in the top bar next to the Blog and Pricing links.
- facebook and youtube: icons in the page footer. They open the Scrapewise pages on those sites.
Last updated 4 November 2026